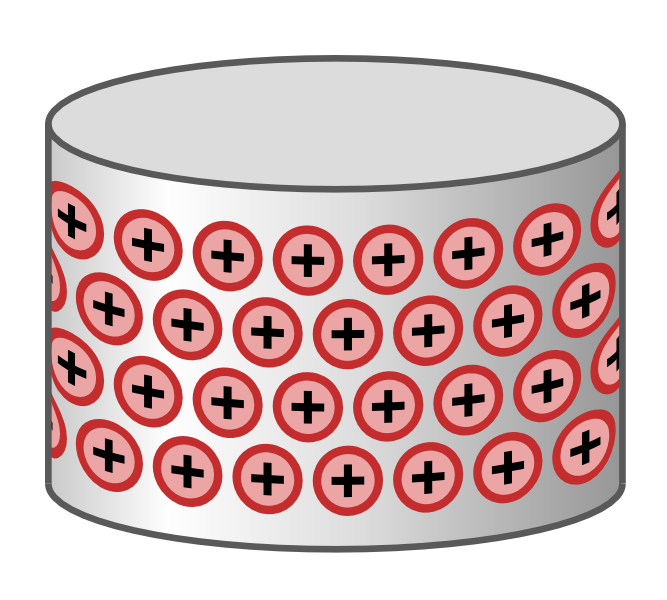
Drawing a 3d-Cylinder with Inkscape
I needed this drawing for explaning the Van-de-Graaff generator. The way it works is suprisingly complex; neither the Germannor the English Wikipedia article on the Van-de-Graaf generator get it right, in my opinion. But I quite like the nice explanation that Rimstar has.
Here are my notes on how I made the drawing:
Drawing the cylinder:
- Start with the top ellipse; give it a gray border
- Duplicate the ellipse (Ctrl+D), move it down
- Double click the new ellipse to get the part-of-circle handle (on the right side, round knob)
- Draw both round knobs, with the cursor being inside the ellipse, around the perimeter to make a half-circle
- Check: "Snap to Cusp Nodes" ("An spitzen Knoten einrasten") in the right-hand toolbar
- Use two solid lines to complete the cylinder
- Use "Fill" on the face of the cylinder and give it a linear gradient (border off!). Use the "Create and edit gradients" tool in the left toolbar to move the anchor points of the gradient around.
- Use solid gray for top side of the cylinder.
Drawing a positive charge
- Don't use borders - neither on the circle, nor on the straight lines that make the plus.
- Instead, use two circles on top of each other for the "border-effect", and use two rectangle for the plus sign. Only draw the inner circle and one rectangle for the plus sign for now. The other rectangle and other circle come later.
- Align the center of the rectangle with the center of the circle by using "snap to object center" in the right-hand toolbar.
- Select the circle and the rectangle and press Ctrl+Shift+C to convert all elements to paths.
- Using the node-editing tool (F2), drop a bunch of extra nodes around the perimeter of the circle. Repeat the same thing for the rectangle. If you don't have enough nodes, the distortion effect will look funny, later.
- Duplicate the circle and make it a bit bigger by dragging the appropriate handle (Hold Ctrl+Shift to keep the original center and the scale during resizing)
- Push it to the back by pressing Page-Down a bunch of times
- Make it a bit darker, so it looks like a nice border
- Duplicate the rectangle and rotate the duplicate. This completes the plus sign.
Cylindrically distorting the positive charges:
- Copy the bottom path of the cylilnder, the "half-ellipse", if you will, and paste it somewhere in your document
- Place the positive charge somewhere on top of it.
- Make sure the z-order of the two is correct: The half-ellipse must be on the bottom, the positive charge on the top
- Use "Extension" -> "Create from Path" (might be called something else in English, I'm back-translating my German version...), "Pattern Along Path".
- Use the following options: Pattern "repeating", deformation type "band". Using the preview function, play with the distances.
- Move the new object out of the way and repeat the "Patten Along Path" thing. Use different distances, so that you end up with your positive charges with some offset.
Putting everything together
- Copy/Paste the two bent-electron-rows multiple times onto your cylinder.
- Use the "Object" -> "Align and Distribute" menu to get the vertical distance even
- Resist the urge to group stuff together too soon. First fix the z-order such that the left and right borders of the cylinder are on top of the positive charges.
Now you are done! Here is my finished svg file.

