Birthday cake
One of my first memories is my grandfather's 60th birthday. My parents prepared a birthday cake for him, but instead of putting 60 candles on it, they baked a 60 Watt lightbulb into the cake, with lightswitch and everything. As a kid I was fascinated with everything that involved light, and I was heavily impressed by this cake.
So naturally, for my father's 60th birthday I wanted to make a cake with 60 LEDs on it. I bought a 5m RGB LED strip, with 30 LEDs per meter, and each LED addressable individually. The LED type was WS2812B. I bought it from China and payed 40€ for the 5m strip (now they seem to sell for 25€ for 5m, including shipping from Germany!). I also bought cheap Arduino nano clones from China for less than 3€/piece to drive it. I wanted to use battery power for the thing, so I bought a LiPo battery (10€), a USB LiPo charger (2€ ?), a 3.7V -> 5V upconverter (2€ again?), and then realized that I am essentially building a USB power-bank. So I got a cheap (7€) USB power bank from Amazon.
There were a few design iterations on how to get the LEDs on the cake. In the end, I settled for an envelope that goes around the cake. This was easiest to make, and can be "installed" on most cakes within seconds.
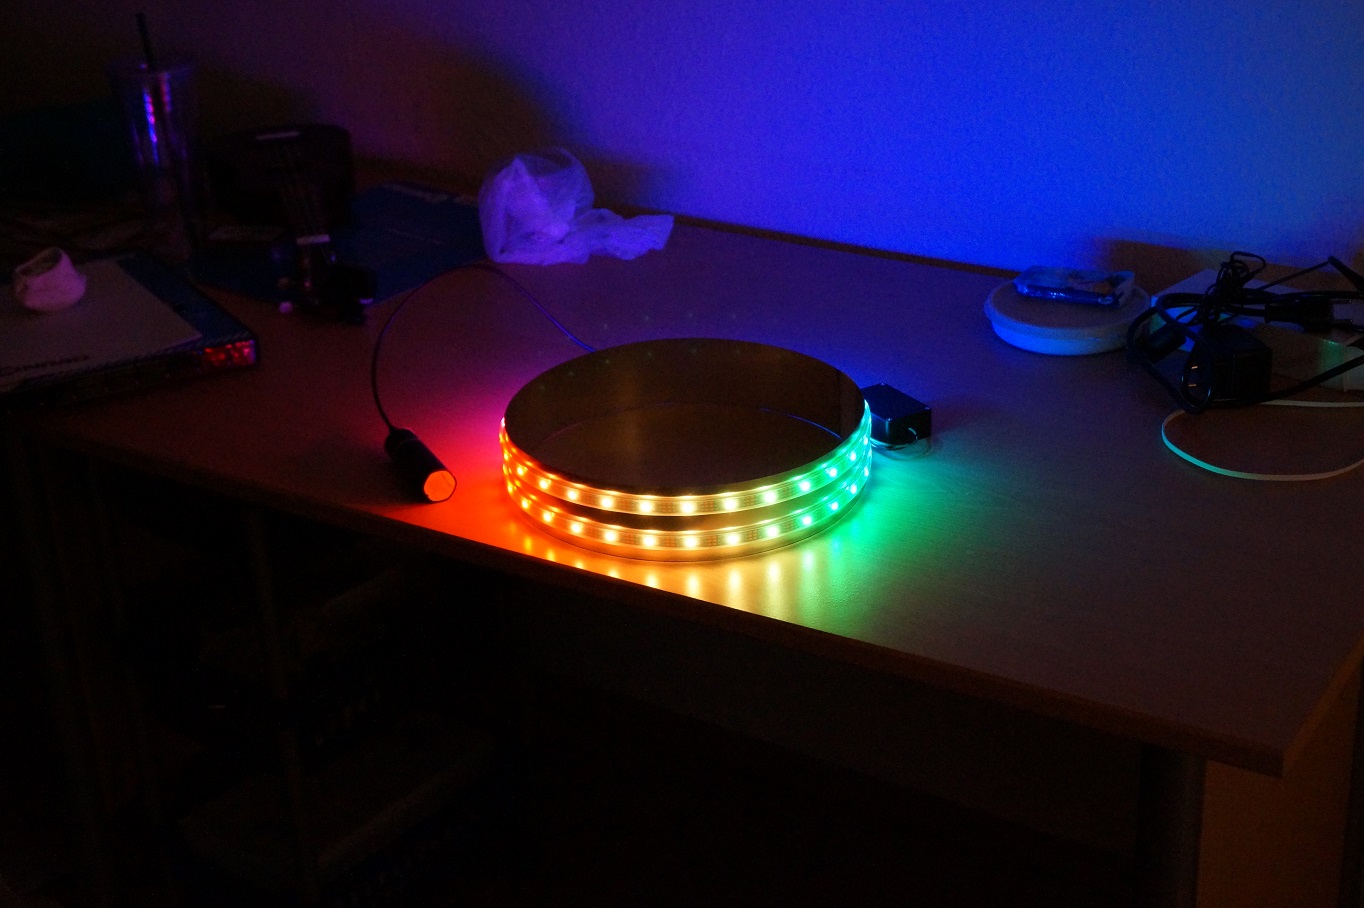
Unfortunately, I don't have any pictures of the build process. I bought a 100cm x 50cm sheet of aluminum (I don't recall the thickness) from the local hardware store and used tinner's snips to cut a 100cm x 20cm strip. The cut was suprisingly clean and only needed light sanding to be smooth. I bent the whole thing into a loop, overlapped the ends by a few cm and epoxied them together. I used JB auto-weld for the epoxy, which I had laying around, but most epoxies should do. I attached the LED strips to the outside using double-sided tape. My LED strip was of the IP67 waterproof variety, so it came in some clear plastic-like tubing. I tested a few glues, but most did not stick to the plastic well. Double sided tape worked best.
I wired up the Arduino and hid it in a small plastic project box. The library support for driving WS2812B LED strips is amazing, and I had to only slightly modify one of the examples to get the effect I wanted: A slowly rotating "color wheel" with the occasional (and only *slightly* cheesy) sparkle.
#include "FastLED.h"

FASTLED_USING_NAMESPACE

#define DATA_PIN    13
#define LED_TYPE    WS2812B
#define COLOR_ORDER GRB
#define NUM_LEDS    58
CRGB leds[NUM_LEDS];

#define FRAMES_PER_SECOND  120

void setup() {
  delay(1000);
  FastLED.addLeds<LED_TYPE,DATA_PIN,COLOR_ORDER>(leds, NUM_LEDS).setCorrection(TypicalLEDStrip);
  // FastLED.setBrightness(BRIGHTNESS);
}

uint8_t gHue = 0; // rotating "base color" used by many of the patterns

void loop()
{
  // Call the current pattern function once, updating the 'leds' array
  double_rainbow();
  addGlitter(2);
  FastLED.show();
  FastLED.delay(1000/FRAMES_PER_SECOND);

  // do some periodic updates
  EVERY_N_MILLISECONDS( 100 ) { gHue++; } // slowly cycle the "base color" through the rainbow
}


void double_rainbow()
{
  // FastLED's built-in rainbow generator, repurposed for DOUBLE RAINBOW ALL THE WAY
  CHSV hsv;
  float fl_hue = (float) gHue;
  hsv.hue = (uint8_t) fl_hue;
  hsv.val = 150;
  hsv.sat = 255;
  for( int i = 0; i < NUM_LEDS/2; i++) {
    leds[i] = hsv;
    leds[i+(NUM_LEDS/2)] = hsv;
    fl_hue += 8.8;
    hsv.hue = (uint8_t) fl_hue;
  }
}

void addGlitter( fract8 chanceOfGlitter)
{
  if( random8() < chanceOfGlitter) {
    leds[ random16(NUM_LEDS) ] += CRGB::White;
  }
}
Unfortunately, I don't have any pictures of the LED envelope on the actual cake. It looked nice! The only thing I would do differently is to make the cable between the envelope and the controller box a bit longer, so that you can put the controller box under the table, instead of right next to the envelope.